State Pass-Through Activities Tutorial
Lesson 4: SPTR Web Application Instruction & Deadlines
Data Entry
This section examines the details of each Data Entry option located on the Main Menu.
Revenue
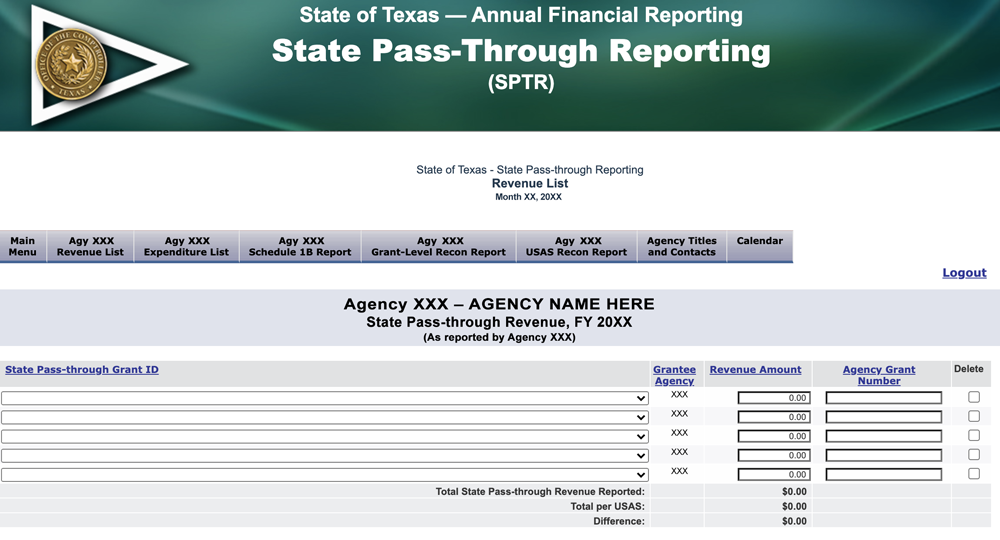
After selecting the reporting agency, to enter revenues:
- Access the Main Menu.
- Select Revenue under the Data Entry section. The Revenue List screen displays.

- Choose the
STATE PASS-THROUGH GRANT IDfrom the drop-down menu of all grants. Grant IDs are sorted by the ID number with the name of each grant is displayed next to the Grant ID. If you do not see the required grant in the drop-down menu, follow the instructions in the Adding a Grant section to add an active state grant. - Enter your agency number in the
GRANTEE AGENCYfield (because your agency is receiving the state pass-through revenues). - Enter the amount (the total by grant) of the grant received in the
REVENUE AMOUNTfield. - Enter the
AGENCY GRANT NUMBER(optional field for agency use only).Note: Some agencies track grants using an internal numbering system, such as a Notice of Grant Award (NOGA) number. The
AGENCY GRANT NUMBERfield allows agencies to enter that number in SPTR. - Verify that the Total per USAS line item (located at the bottom of the data entry screen) matches the Total State Pass-through Revenue Reported and that the Difference line item equals zero. If these totals do not match, your agency needs to research the cause and make the necessary adjustments.
Note: Agencies may choose to remove a certain grant’s record previously saved in SPTR by selecting the Delete check box to the right of the grant.
Expenditures
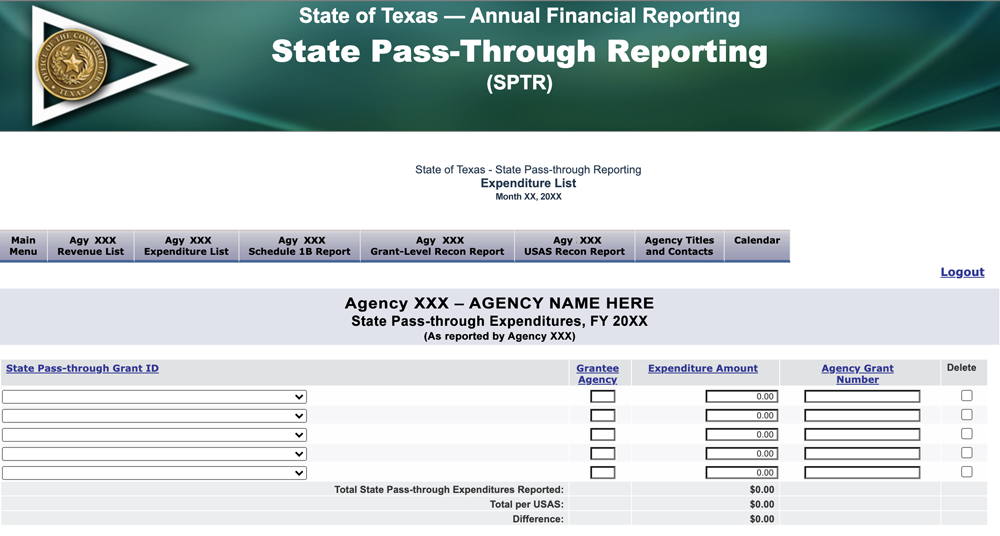
The recording of expenditures follows a parallel process as recording revenues. After selecting the reporting agency, to enter expenditures:
- Access the Main Menu.
- Select Expenditures in the Data Entry area. The Expenditure List screen displays.

- Enter the agency number of the agency the grant was sent to in the
GRANTEE AGENCYfield. The remaining fields are similar to the fields described in the Revenue section.
Batch Entry
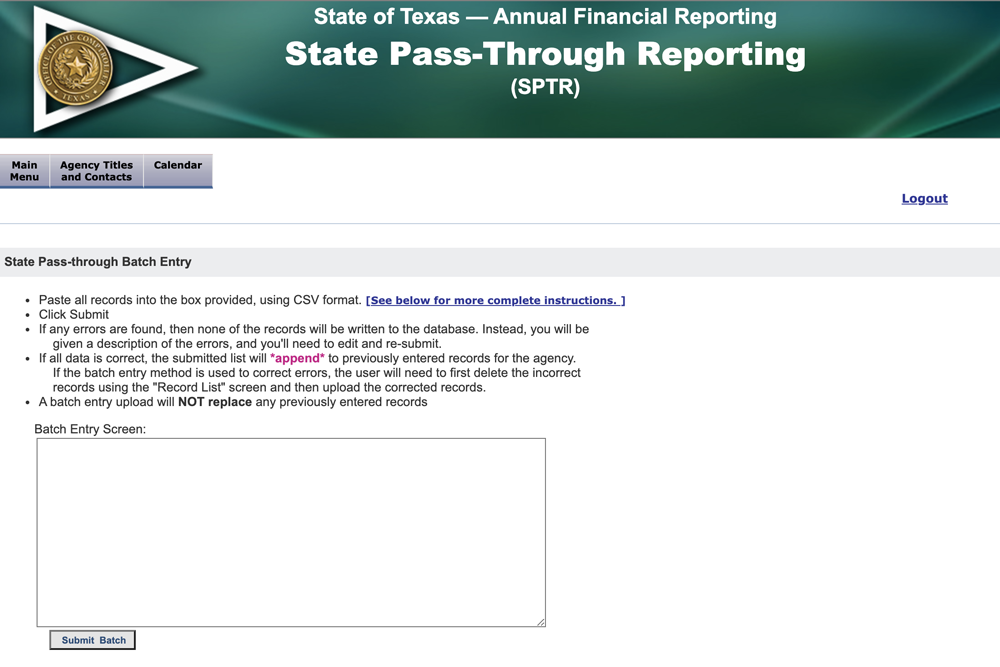
The Batch Entry option allows the input of numerous grants at one time. To enter Batch Entries:
- Access the Main Menu.
- Select Batch Entry in the Data Entry area. The State Pass-through Batch Entry screen displays with instructions.

Note: For more information for both the instruction and the excel worksheet, see the Resources section.